Fun With Tiles #4
See also Part 1, Part 2, Part 3, Part 5.
This was done using Gimp 2.2.
Effects On Tiles
Now that you have some tiles, here are some effects you can apply to them to spice them up. These effects are best done on abstract, smoothly blended images, such as those created by "Blur and Smudge" in part 3.
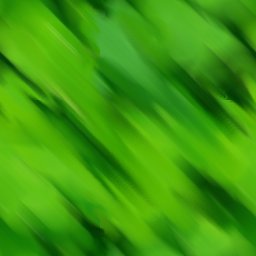
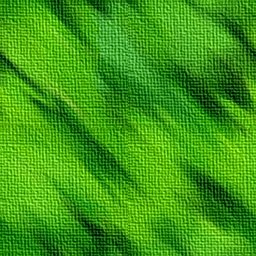
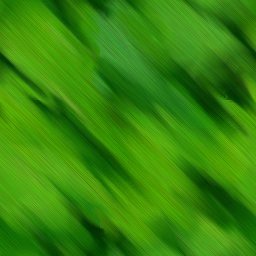
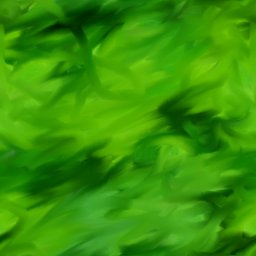
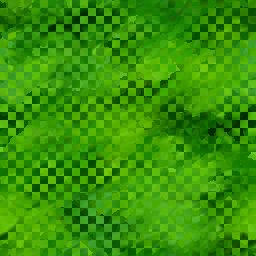
For this section, we're starting with the following base image, made in part 3:
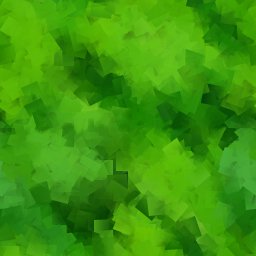
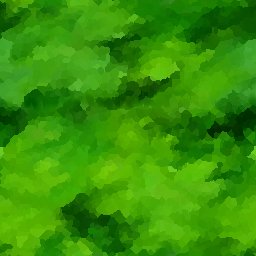
Cubism
- Filters -> Artistic -> Cubism
- Apply offset.
- Use the Smudge tool with "hard edge" on, to blend the bits that don't match.
Result:
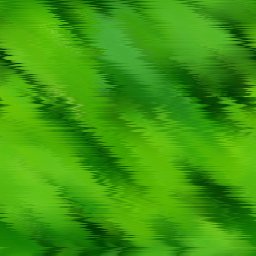
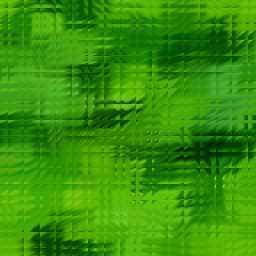
Shift
- Filters -> Distorts -> Shift
Result:
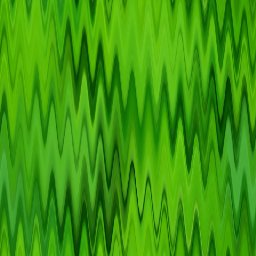
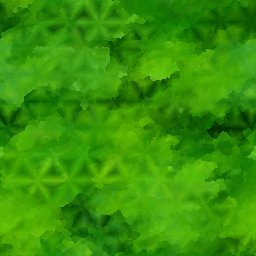
Ripple
- Filters -> Distorts -> Ripple
Make sure the "Retain tileability" option is on. - Apply offset to see if the ripples match up; the "Retain tileability" option only makes sure they're tileable in one direction, not both.
- If the ripples don't match up, undo what you've done, and apply the Ripple effect again, adjusting the Period option. This may take a few tries to get right.
Result:
Canvas
- Filters -> Artistic -> Apply Canvas
Result:
Brushed
- Create a new white layer, call it "brushed".
- To "brushed", apply Filters -> Noise -> Scatter RGB
- To "brushed", apply Filters -> Blur -> Motion Blur; if the original was motion-blurred, make sure the angle of the blur is the same.
- Apply offset to "brushed".
- "Motion Blur" again.
- To "brushed" Layer -> Colors -> Levels to make the colors a bit darker.
- Change the layer mode of "brushed" to multiply.
Result:
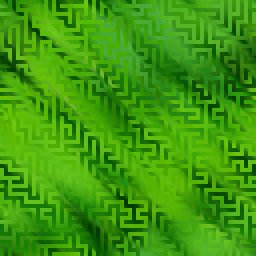
Maze
This is a fun effect which I recently discovered (circa 2007).
- Duplicate the layer; call the top layer "maze1".
- Add layer mask to "maze1", all white.
- To the layer mask of "maze1",
Filters -> Render -> Pattern -> Maze
Make sure that the "tileable" option is on. Also make sure that the width and height options are factors of the width and height of the image, so they fit better. - To the main layer of "maze1" apply a random offset (that is, give some random number in the x direction, and another random number in the y direction).
- Flatten the image and save.
Result:
 |
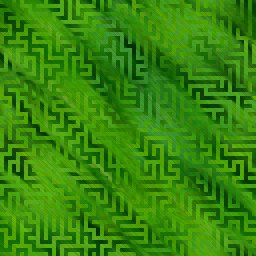
Applied to "brushed" image. |
More Examples
Starting from this: (A)
1. A + Crystalize + Blur + Warp Sharp
2. A + Glass Tile
3. A + #1 + Maze technique with Voronoi
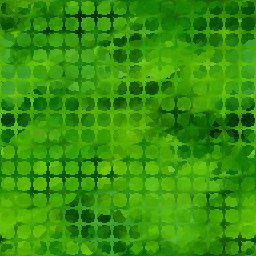
4. A + #1 + Maze technique with Checkers
5. A + #1 + Maze technique with Grid