Fun With Tiles #3
See also Part 1 Part 2 Part 4.
This was done using Gimp 2.2.
Asymmetrical Seamless Tiles
Asymmetrical seamless tiles are tiles where you can't tell where the edge of the tile image is, when you look at it on the desktop, and this is achieved without having to make it symmetrical.
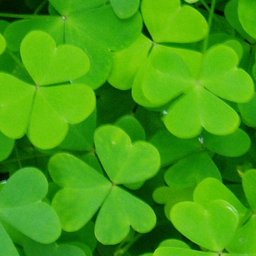
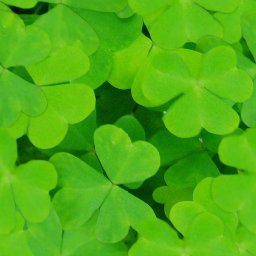
For this tile stuff, we're starting with the following base images, which were cut out of a photo I took:
Offset Is Your Friend
The most useful tool for making asymmetrical tiles is the "offset" function:
Layer -> Transform -> Offset
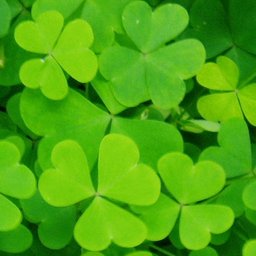
The usual first step for making asymmetrical tiles is to take your image, and apply an offset (usually x/2 + y/2). This enables you to see how the edges of the tile match (or usually, don't match) against each other. Then one applies various techniques to make the edges match. Often one then has to iterate through this cycle again, applying offset, seeing how it looks, and tweaking to eliminate the last few mismatches.
The following sections describe a few techniques for making the edges match.
Layer Mask
This technique preserves the likeness of the original, but may not work with all images.
- Duplicate the layer.
- Apply offset to the bottom layer.
- Add a layer mask to the top layer, clicking on the "black" option (to make the whole layer transparent).
- With a white brush, paint in the layer mask to reveal bits of the top image, so that they hide the non-matching bits in the lower layer.
Alternatively, or additionally, instead of using the original image to paint over itself, you could use a similar-but-different image (for example, if you've cut out a portion of a photo to use as your starter image, using another part of the same photo can work).
This method does tend to work better where there aren't recognisably distinct shapes (such as leaves) so this example looks a bit odd, I know. I've also applied "Warp Sharp" to make it look sharper.
Result:
Paste Bits
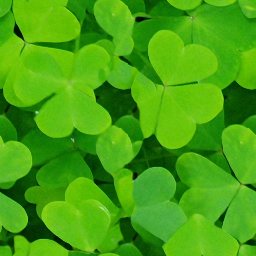
This is the most painstaking technique, but is the one which preserves the original the best.
- Duplicate the layer. Call the top layer "orig1" and the bottom layer "offset1".
- Apply offset to "offset1" layer.
- Painstakingly select a portion of "orig1" layer that can stand on its own -- like one pebble or one leaf.
- Copy selection, paste as a new layer (Paste, then click on the "new layer" icon in the Layers dialogue). Rename the layer "item1".
- Duplicate the "item1" layer. Call it "item1a".
- Hide everything except "item1a", and "offset1". Move these layers until they are next to each other.
- Use the Move tool to move the "item1a" layer around until
it nicely covers a non-matching section of "offset1".
One can also use the Rotate tool on the item1a layer to change its orientation so that it fits a spot better (and so that it isn't so obvious that it's a copy of some part of the image).
One could also use a layer mask to paint out some parts of it to make it look as if the item is underneath other parts of the image, rather than pasted above them. - Merge Down. Layer To Image Size.
- Repeat from Step 5, until you think you've used enough of "item1".
- Repeat from Step 3, calling the new item "item2", and so on.
- Flatten the image, and save.
Result: (I also applied "Warp Sharp" to this)
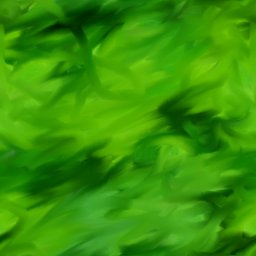
Random Smudge
This technique doesn't leave anything recognisable from the original image, but is useful when you are wanting an abstract tile and are just interested in the colours of the original image.
- Apply Offset to the image.
- Use the Smudge tool with wild abandon, smudging the image to unrecognisability. One can also use different-shaped brushes for an interesting effect.
- Apply Offset to the image, and do more smudging. Repeat until the edges match.
Result:
Round brush with soft edge. |
X-shaped brush with hard edge. |
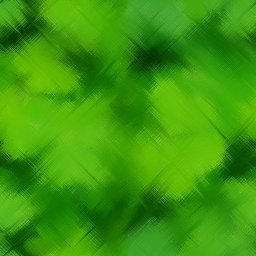
Blur And Smudge
This technique doesn't leave anything recognisable from the original image, but is useful when you are wanting an abstract tile and are just interested in the colours of the original image.
- Apply Offset to the image.
- Motion Blur
Filters -> Blur -> Motion Blur
Make the length of the blur quite large, at least 15; use the preview to see how blurry it is; it needs to be so blurry that that there is nothing but streaks of colour. - Apply Offset to the image.
- Use the Smudge tool to blend the edges together. To make the smudging straight rather than wobbly-by-hand, click on the image, move the cursor at the same angle as the motion blur was, and Shift-Click. This will give you a straight-line smudge along the same lines as the motion. (this is the same technique for making straight lines with the Pencil)
- Apply Offset to the image, and do more smudging. Repeat until the edges match.
Result:
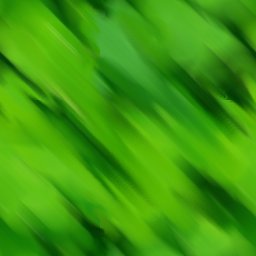
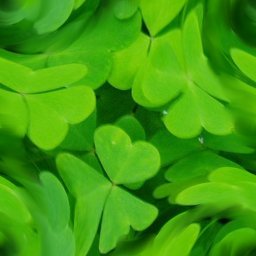
Smudge and Whirl
This technique preserves more of the original image, but also distorts it.
- Apply Offset to the image.
- Use the Smudge tool to blend the edges together. Yes, they will look smudgy, but the next step will help with that. Still, it will depend on the particular image how well this works.
- Filters -> Distorts -> Whirl And Pinch
This camouflages the smudges in the greater distortion caused by the "whirl" effect.
Result:
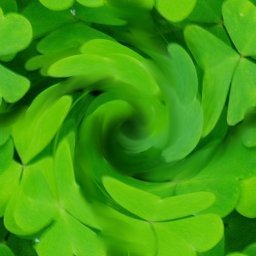
|
 Offset by x/2 y/2 |